ONLINE COSMETICS 2012
MORE INFO ABOUT COSMETICS
Showing posts with label concealer. Show all posts

Saturday, June 19, 2010

Cosmetic tips : Making you look beautiful and attractive.


Step 1 : Clean your hand and then clean your face before you apply cosmetics.


Step 2 : Choose blended foundation with your skin tone. Be aware a dark foundation.

Step 3 : Apply concealer to hind the blemish of the skin before you use foundation.

Step 4 : Draw a line with eye liners, on the outer of the eye lash and create the magic.

Step 5 : Choose eye shadow. Avoid darker shade in during day time.

Step 6 : Match lipsticks with your complexion. You can use lip liner to determine your lip.

Don’t forget to select branded cosmetics to be confident in quality. That’s it ,it makes you look beautiful and attractive.

Link : http://beauty-update.blogspot.com/

Sunday, June 13, 2010

Apply eyeshadow professionally

Step1: Blending is a key

You use three different colors: The base, usually a very light taupe, a highlighter for the crease and a main color for the lid, but how to get them to look as if they merge into each other like the colors of a rainbow?

My secret: Start light then go darker. Brush the base color to the entire eye up to the brow bone (base is the lightest color), apply the lid color (the medium color) and THEN apply the highlighter (the darkest color). Also, don't be too heavy-handed or you'll have to start over.

Step 2 : Choose shadows that make the color of your eyes pop

Gone are the days when beauty experts advised against blue shadow. Matching the color of your eye with a shadow actually brings the color out (think blue shadow on blue eyes). At the same time, contrasting colors make eyes pop too (think a deep jeweled blue shadow on deep brown eyes or gorgeous golds with blue eyes).

Step 3 : Never apply deep color to your browbone -- unless you're doing a cover shoot for Vogue

You don't want the drama too much shadow brings. Apply shadow up to the browbone but don't apply shadow ON the bone unless it's a neutral color.

Step 4: Highlighter can make or break your look

When applying dark shadow to the crease of your eye, be careful to blend only on the outside edge. Get to close to the eye and you'll cause your eyes to look teeny and beady.

Step 5: Set shadow with a great base

Primers are super hot right now because they help set makeup that stays for hours. I've found the secret to keeping shadow in place for hours is a shadow base, or primer. Almost everyone makes them but I swear by Urban Decay's Primer Potion.

I apply Urban Decay Primer Potion at the beginning of the day and sweep my favorite Christian Dior shadow over it and the shadow stays on all day long with nary a smudge, even through hardcore workouts with my personal trainer. You cannot beat that.

Step 6 : Shimmer is hot, but plays up wrinkles

Shimmer makes eyes really pop, but it also highlights heavy lids, lines and wrinkles. If you don't have wrinkled eyelids yet (I do and I don't care!), try this great look for shimmer: create a "nude" lid, but apply a bit of gold shimmer to the browbone. Gorgeous!

Step 7 : Smokey is great, but keep it to the lid

Making up a smokey eye? Keep color to the lid and just under the lower lashline. Don't extend color above the crease.

Step 8 : How to pair shadow with red lips

Remember the beauty rule "Thou Shalt Not Play up the Lips AND the Mouth." If you're going for dramatic red lips (never out of fashion), cover unsightly blue lines on lids with a concealer or shadow primer and then keep eyeshadow light.

Step 9 : Make eyes brighter with white

A dot of white shadow or pencil on the inside of the eye near the tear duct will make eyes look brighter. You won't believe how eye-opening this is. It works so great, I use this trick even when doing my makeup for work.

Step 10 : Go for color

I love going to Sephora and trying out different shades on my lids just for something different. Taupe and lavender look great on all eye colors. Also consider mixing shades if you bought a color that's just too bold for you. Mixing an electric blue with taupe can turn out the most perfect color.


Appreciated  for : http://beauty.about.com/

Thursday, June 3, 2010

Is cheap makeup cheap product?


Is cheap makeup cheap product?

Often times, people are concerned that cheap makeup is nothing more than a cheap product. They prefer to buy the more expensive kinds of makeup because they think they will get a better quality, when in reality, sometimes, the expensive makeup that you just paid thirty dollars for is cheaper than the cheapest thing that you find in the grocery store.

Here are some things that you should know about cheap makeup before you make a decision to go to the cosmetic counter and shell out a lot of money for something that you could have gotten cheaper.

Cheap makeup from big companies

The first thing that should be stated about cheap makeup is that in many instances, cheaper makeup is often put out by a more expensive company so that they can spread their name around. Just because it says BonneBell or Cover Girl doesn’t mean that it’s a lesser product because these two companies are the same. Often times, a company like this will make cheaper makeup because it is made for little girls so that they can play dress up. It is meant to be wiped off easily with a wet cloth so that you can reapply as many times as you like.

Cheap vs. expensive makeup?

In some cases, it is better to buy the more expensive products such as foundations, blush or concealers because they have minerals and oils that are good for your skin that will be absorbed. In some of these ingredients, such as foundations, they have better quality ingredients that some of the cheaper makeup companies may not have. An example of this is that many companies use roses in their products but the more expensive companies have a larger margin for expenses and can buy the top pick of roses that they want to use, other companies that may not have that same expense margin may buy whatever the other makeup companies didn’t want for their products, therefore, it is not the best of the best quality available- even though it’s from the same grower or greenhouse.

When cheap makeup is better?

When it comes to mascara, a product that doesn’t really touch your skin, it is okay to use the cheaper brands because it is only being applied to hairs- your eyelashes- that are already considered dead. It won’t make any difference if you paid eighty dollars for that Dior tube of mascara or you bought the ninety-nine cent Wen-N-Wild brand. Other products such as eye shadows are okay to buy the less expensive brands. One thing that you will always want to avoid no matter the brand is glitter in your eyeshadow because it can easily become loose and get into your eye causing infections and irritations. When it comes to using colorful eye shadows, the companies that you can find in the drug store often have better and more colors because they focus their monies on this area. This is why you can get a nice bright purple when you buy Rimmel or Jane and you can’t when you are looking at Bare Essentials because they use more natural pigments.

Regardless of the type of makeup you prefer, consider where it goes. If it is something that is going to absorb into your skin like your foundation, then you may want to use something with more natural ingredients. Once the foundation is on, you can apply whatever you feel like it over the top.

Link : http://beauty-update.blogspot.com/

Tuesday, February 16, 2010

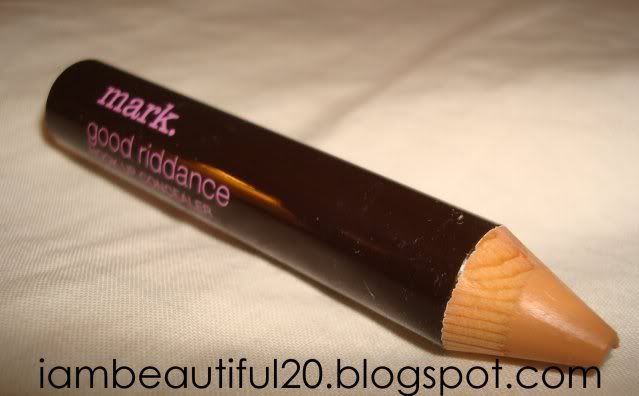
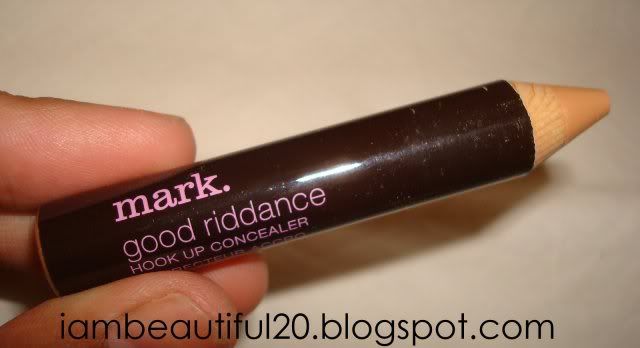
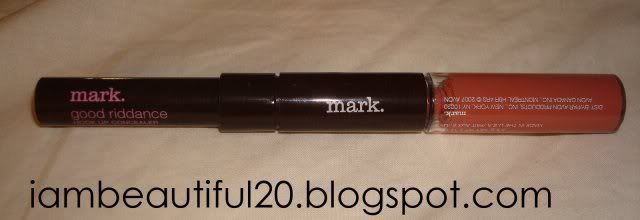
Product Review: MARK Good Riddance HookUp concealer

Hello readers! I'm back with another review of Mark Good Riddance HookUp concealer in Medium/Deep. I'm currently using this concealer for everyday use and, I am pleased to say that I really like this product. It covers my light dark circles, blemishes and, it is very portable.
Photobucket
Specifications:

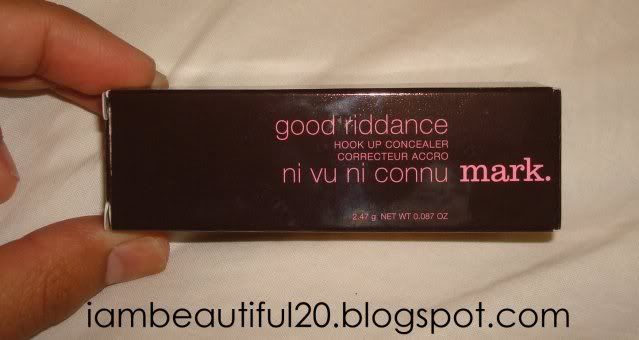
WHAT:  A concealer in a pencil form as part of Mark's Hook Up line. Product claims that it cover skin imperfections or under-eye circles with this creamy, oil-free concealer stick that glides gently over the skin. (http://meetmark.com/)
WHERE Can be purchased through your local Mark representative or go to http://meetmark.com/ or go to my mark e-botique at http://www.mymarkstore.com/rceleste
AMOUNT: 0.087 oz. net wt.
COLORS: Comes in 4 shades all yellow based.
            -Fair/Light,
            -Light/Med,
            -Medium/Deep,
            -Deep.
TEXTURE: Its very creamy and goes smooth on the skin. Safe enough to apply under the eyes and blend with a finger
PRICE: $6.00 but right now you can buy 2 and get 1 free from any of their HookUp collection.

Photobucket

Photobucket

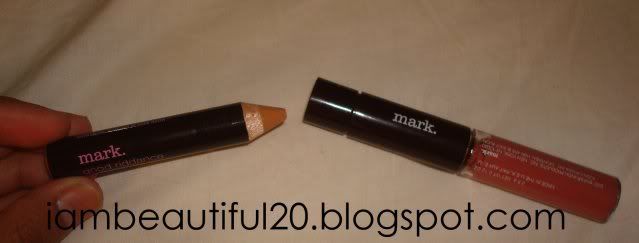
A HookUp connector is free when you purchase 2. You can hook up 2 items on both ends. There are a lot of HookUp items to choose from. For example, I put together good riddance concealer on one end and plumping lip gloss on the other end. You can customize and switch them up according to your preference. They are so portable and convenient

Photobucket
Photobucket
Photobucket
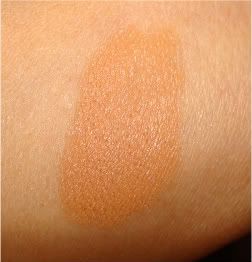
swatch of Medium/Deep
PROS:
-The product is very creamy for a pencil form concealer ^_^
-It works well covering my blemishes and light under eye circle.
-I really like the whole idea of the HookUP line. Its very portable and you can customize what you can put in the hook up connector.

CONS:
-The product is quite small.
-Sharpening the pencil makes you waste more product. No bueno!

Final Thought: Its a great product but keep in mind that whatever works for me might not work for you. I really like the product because it works for me.  Read more reviews on http://makeupalley.com/ and http://meetmark.com/ to see what other people think and feel about it.

 Go to my E-botique if you are interested in purchasing Mark products

Tuesday, January 5, 2010

Top 5 Beautyful Tips for Prom - makeup

The weeks before prom can be crazy. There's nothing better than planning your dress, shoes, prom makeup and hair. To make things easier, we've compiled the five prom makeup musts for this year's event. If you live by these prom makeup tips, we guarantee you won't look weird, boring or too much like your regular, everyday self for this year's prom. Have fun!

Prom Makeup Tip #1: Pick your eyes OR your mouth

The biggest mistake people make when putting on makeup is that they highlight both the eye and the mouth. You need to pick one or the other and downplay what you rejected.

How to pick? Simple. What do people compliment you on? Do you have Angelina Jolie's lips or Kate Bosworth's eyes? If you choose to focus on your lips, you'll want to go bright. Red is hot for prom, as are dark pinks. Just stay away from brown (leave it for your grandmother) and make sure you keep your eye makeup soft and simple.

For the right way to wear red lipstick check out this article . If you want to play up your eyes, go all out with liner, shadow, mascara and even false eyelashes (the ones that AREN'T obnoxious and outlandish). Just make sure you stick with light lips capped with a light gloss.

Smokey eyes are a great look for prom. Here are step-by-step instructions .


Prom Makeup Tip #2: Perfect your skin tone.

Perfecting your skin tone can be more important than eye makeup. But the secret is to make it look like you're wearing hardly any makeup. In this article, we show you how to achieve a flawless face.

While we're firm believers that few women under age 25 need foundation, if you have acne or an uneven skin tone, you'll want to cover it up with concealer and foundation.


To avoid the pancake batter look, only apply foundation on the areas of skin that are discolored or have blemishes (usually the forehead, cheeks and chin). Make sure to choose a foundation that perfectly matches your skin and blend in well along the jawline.

Unsure how to pick the right foundation? Skip the drugstore and head instead to a department store or Sephora, where you can try before you buy.


Prom Makeup Tip #3: If in doubt, mimic a celebrity

A good trick for those of us overwhelmed with hair and makeup choices is to mimic a celebrity look. Whomever you're into, whether it be Mischa Barton (pictured right), Carrie Underwood, Kristin Callaveri or Ashlee Simpson, you can adapt their look for your prom.

Chances are a professional makeup artist did the celebrity's makeup. If you're having your makeup done at a department store counter before prom, you can bring along the picture for your makeup artist to perfect.

It can also be easy to do it yourself since many magazines name the products used on the celebrity. This way you can apply the exact makeup the celeb used. Here are some of our favorite looks:

1. Penelope Cruz's smokey eyes). Remember to keep your cheek color natural and use a very light lipstick. See directions for how to get a smokey eye above.

2. Sienna Miller's sweet and sexy look). Keep cheeks dewy with a pink blush and plump up lips with a colored gloss.

3. Red lipstick is a great look, just make sure to pick the perfect shade and go light on your eyes, otherwise you'll risk looking like a Cameron Diaz 'don't').

4. Dark-rimmed eyes, like Katherine Heigl's, are gorgeous. Again, a light gloss on the lips will do you.
Tear out a picture of your favorite celebrity and practice the look before the big night. Once you're at prom, no one but you has to know you're the OTHER Mary-Kate Olsen.

Prom Makeup Tip #4: Three things to remember when taking pictures

You'll have those prom pictures for years, so don't forget these three things:

1. Apply liner and lipstick WITH A MIRROR before you pose.

2. Powder your oily areas (forehead, chin and nose) immediately before the picture. Or better yet, keep blotting papers in your purse.

3. Find out how to stand so you look ten pounds thinner.

Prom Makeup Tip #5: What to bring in your purse

Every purse needs blotting papers (better than applying powder all night, which can leave you looking like a mime), lipstick or gloss, powder (just in case), breath mints and a small bottle of hairspray.

One last thing: Remember, a happy, fun attitude is your biggest beauty weapon. Who doesn't look beautiful when they're happy and smiling?


Thanks for : http://beauty.about.com

Sunday, January 3, 2010

How to Apply Eye Makeup in 8 Steps


When evening calls for a glamorous look, you want to focus on making your eyes amazing. Here's how to apply eye makeup in only 8 steps.
Difficulty: Easy
Time Required: 10 minutes
Here's How:

1. Prep your eyes with concealer Concealer can be used to cover up undereye circles or just the bluish discoloration just under your inner eye. To cover dark undereye circles, apply three dots of concealer under each eye. Start at the inner corner where skin tends to be darkest, then under the pupil and the third on the outer edge. Pat, never rub with your ring finger (this finger tends to have the softest pad) until it disappears.


2. Apply eye base to your lid eye base is the secret to keeping your shadow in place for hours. Without properly priming your lid first, your eyeshadow will likely end up a greasy line in your crease.

3. Apply shadow. It's great to use a three-toned shadow and build from lids to brow. Allowing them to blend into each other like a rainbow is gorgeous, according to celebrity makeup artist Mally Roncal. Start with a light color that almost matches your lid. Sweep the color across the lid and up to your browbone. Follow with a medium color across your lid only. Build on this with a darker color in the crease. Blend the colors well.

4. Follow with eyeliner Dark eyeshadows work great as eyeliners. Wet a slanted brush, then dip in a dark eyeshadow. Line eyes as close to the upper lashes as possible from the inner corner to the outer corner. Follow with liner on bottom eyes, but only line from the middle of the eye out. Smudge the bottom line with a Q-tip or your finger. You don't want a prominent line. For a smokey eye, use a brush to pat in a dark eyeshadow along the upper lid and below the lid. You don't want a stark line, instead you want to blend it so it's 'smudge-y.'

5. Brighten your eyes with a highlighter This step involves only the inside part of the eye. With a gold or pink highlighter (white is too bright), draw a v-shaped shape that follows the inner corner of your eye from top to bottom. Blend with your fingers. This will help make eyes 'pop.'

6. Highlight your brow Take the same highlighter and dab it on your browbone, concentrating on your mid-brow outward. Blend with your finger.

7. Curl lashes An eyelash curler will make even long lashes look more gorgeous. For added effect, you can heat the curler under a blowdryer for a couple seconds. Test curler before applying to lashes because you could burn yourself.

8. Apply mascara Place the wand of your mascara brush at the bottom of lashes and wiggle back and forth. Follow with another few sweeps of the wand. Apply to bottom lashes as well.

Link : http://beauty-update.blogspot.com/

Tuesday, December 29, 2009

NARS for 10 bucks!

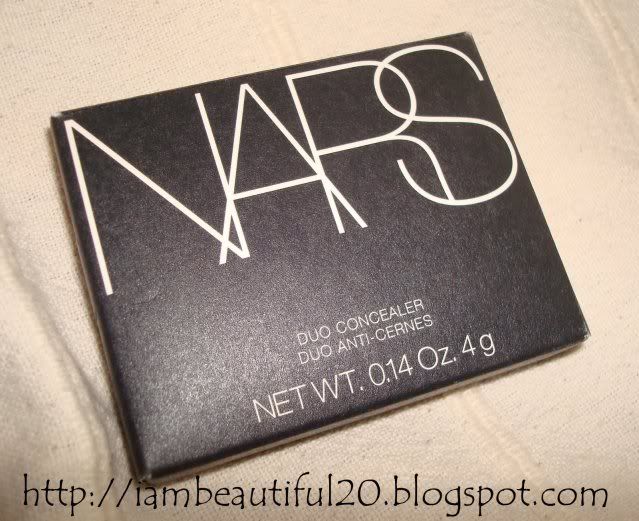
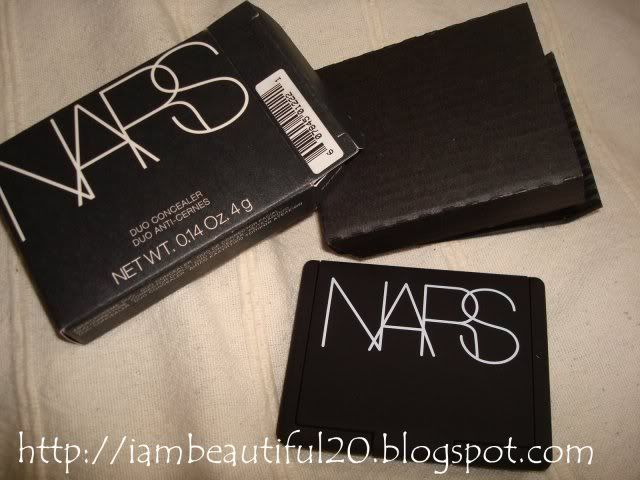
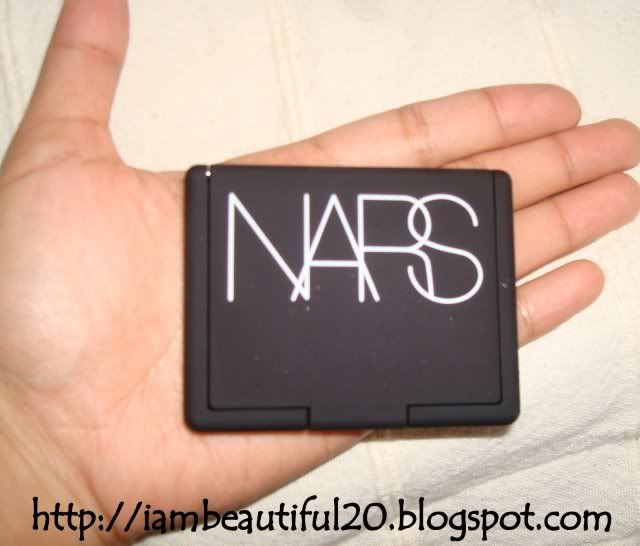
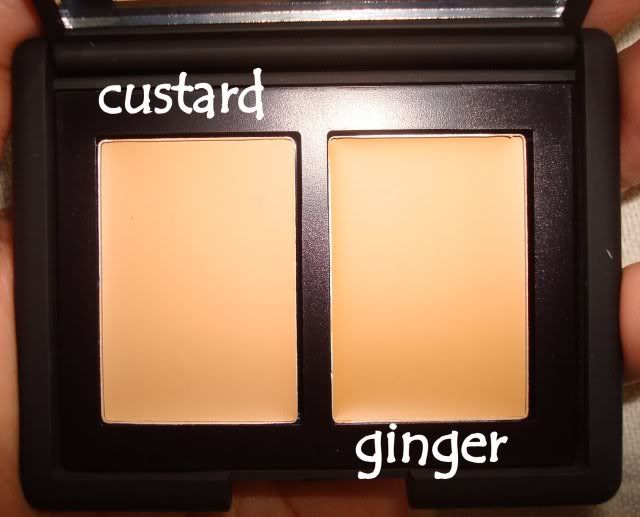
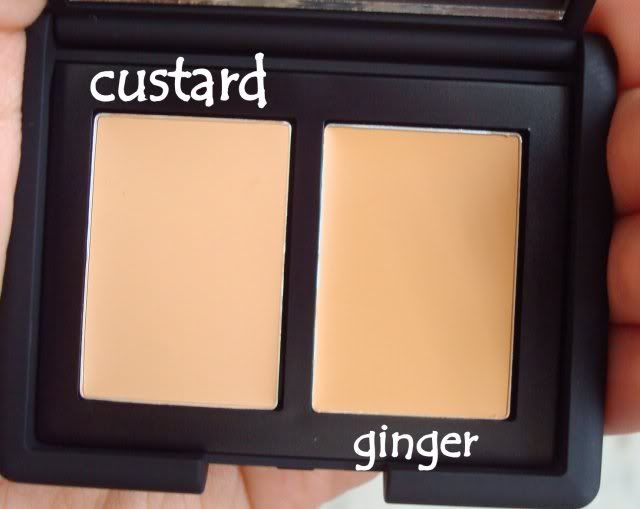
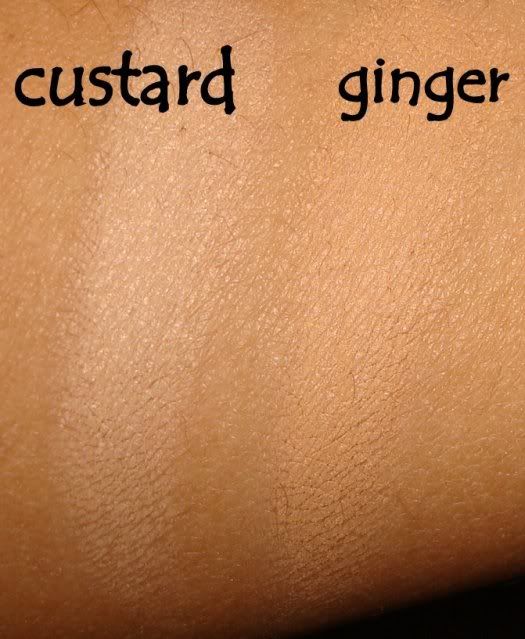
I love holiday sales. I went to my local Sephora and they are having  Good Buy 2009 steals for 10 dollars or less. They had so many great items from Stila, Nars, Benefit, Boscia, Tarte, Cover Fx to Anastacia and more. I had to get atleast one for myself. I got the Nars duo concealer in custard/ginger.

Photobucket

Photobucket

Photobucket

Photobucket

What is it?
A compact containing two shades of NARS concealer. Custard/Ginger is for light to medium complexions.

What does it do?
NARS Duo Concealer camouflages blemishes and dark spots and evens out the skin's tonal variations. Enriched with Vitamin E, this lightweight, non-drying formula won't settle into fine lines or creases.

What do I think about it?
I really like it. The texture is creamy and easy to blend. I use Ginger which is really close to my skintone to cover up blemishes and under my eyes and It works well.


retails for $30
but i got it for $10

Photobucket
with flash

Photobucket
without flash

swatches
Photobucket

Sephora's 10 dollar deals wont last long so take advantage of it while you still can. They are available online and at your local Sephora stores.

http://www.sephora.com/